
Using an app designer tool, model-driven app design focuses on integrating components such as forms, views, charts, and dashboards into tables. Furthermore, relationships link tables together in a way that allows for easy access between them and prevents data from being duplicated. You can create simple or complicated apps with the app designer with little or no coding.
What is Model-Driven App?
Model-driven apps use the new Unified Interface client, which offers a responsive, accessible design that works across browsers and mobile devices. This app type combines a variety of component types, such as dashboards, forms, views, charts, and business processes, to provide a fantastic user interface. You’re already familiar with the Power Apps platform and Model-driven Apps if you’re familiar with the Dynamics 365 platform.
You can quickly and easily create business apps using both model-driven and canvas apps. They have access to the Common Data Service, which contains both standard and bespoke entities. Canvas apps start with your user experience, allowing you to create a highly customized interface using the power of a blank canvas and linking it to 200 data sources. Canvas apps are available for use on the web, mobile devices, and tablets. Model-driven apps begin with your data model, which is built up from the shape of your core business data and processes stored in the Common Data Service to model forms, views, and other components. Model-driven apps provide beautiful UI that is responsive across devices automatically.
Model-driven apps are created and managed through the Power Apps Portal in the same way as canvas apps are. A mode switch has been added to the lower-left corner, allowing you to move between canvas and model-driven creation modes.
Model Driven-apps
Process-driven apps that are data-dense and make it easy for users to traverse between related records are particularly well suited to model-driven apps. A model-driven app is an excellent choice if you’re designing an app to handle a complex process, such as onboarding new workers, managing a sales process, or maintaining member relationships in an institution like a bank.
Data Model-Driven Apps
While they’re named model-driven apps, they’re more commonly referred to as data model-driven apps. This is because you can’t construct a model-driven software without a data model stored in Microsoft Dataverse.
User Experience
From the user’s perspective, all model-driven apps provide a consistent experience that is accessible to a wide range of users and devices. The situation is depicted in the diagram below.
The software in this example has three tables (challenges, ideas, and team projects), one dashboard, and numerous charts and views. The left pane of the dashboard can be used to browse between the tables.
Related Reading: What are the Differences Between Canvas Apps and Model-Driven Apps?
Benefits Of Model-Driven Apps
Unlike canvas app development, where the designer has unlimited control over the app layout, most of the user interface in model-driven apps is determined for you and is largely influenced by the components you add to the app. This style of application development has a number of noticeable advantages.
Due to rich component-focused no-code designers, the construction process is quite quick once the data model and relationships have been developed.
Apps offer a consistent user interface across all platforms, including desktop and mobile.
The apps are immediately available and responsive.
All model-driven apps provide a uniform user experience. Later model-driven apps are easier to implement within an organization once a user has gained confidence with one.
Using solutions, migrating apps across development, test, and production environments are relatively simple.
How to Create Your Own Model-Driven App?
We propose starting with a solution to build your model-driven app. Dataverse tables, forms, views, apps, flows, and other components can all be found in a solution. You may easily move your model-driven app to other environments or keep a copy in your source control repository if you construct it in a solution.
1. On the left navigation pane, pick Solutions, and then New solution.
2. Give your solution a display name, such as Power Apps Training. The account table that will be used in your model-driven program is then added.
3. Select Add existing and then Table in your solution.
4. Select the Account table from the Add existing tables page, then Next.
5. Select Add after you’ve selected Include all components.
You’re ready to develop a model-driven app now that you have a solution and have added the account table to it.
6. Select New, then App, and Model-driven app from the drop-down menu in your solution.
7. After selecting Modern app designer select Create.
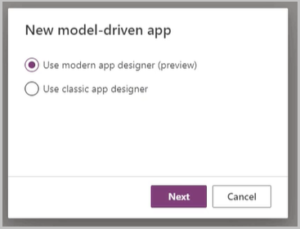

8. Add a name for the app and select Create
Add Pages To Your App
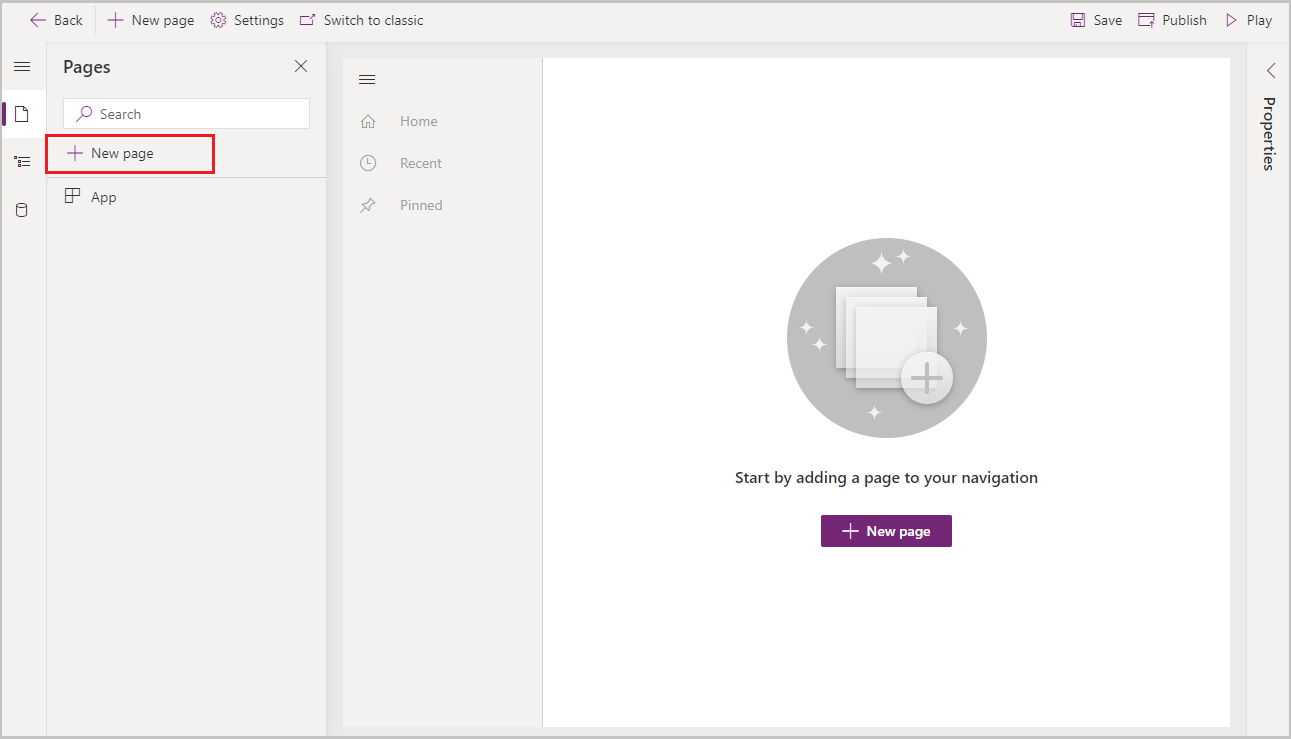
1. The model-driven app then gets a new page. From the Pages menu, choose New page.

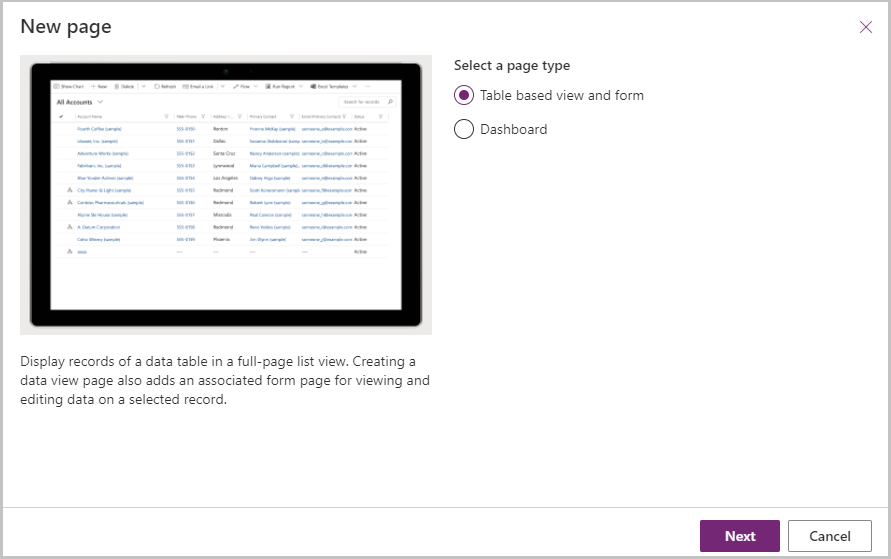
2. To a model-driven app, add a page. After that, pick a Table-based view and form, and then Next.

3. The Account table should be selected, and then Add.
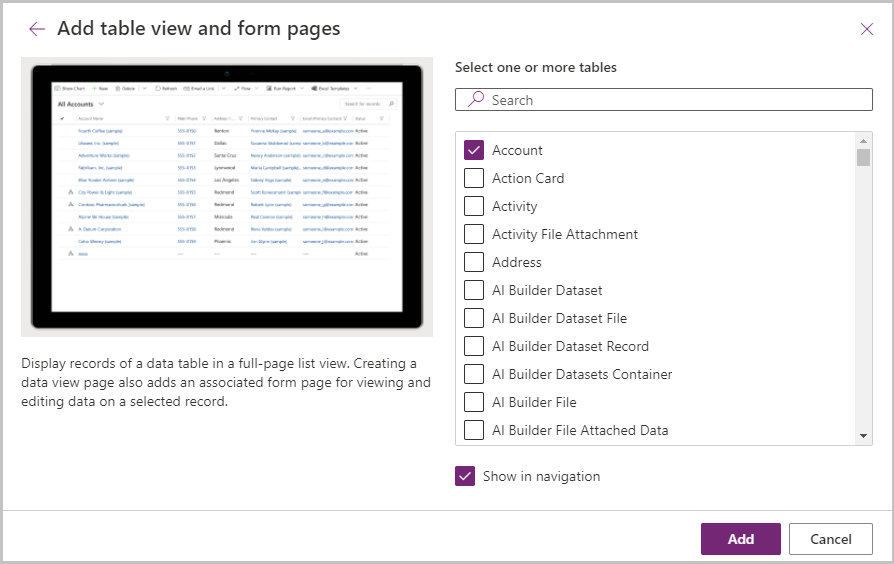

4. In the pages menu, you’ll find the account form and view.
5. Select Account view, then Manage views from the drop-down menu.
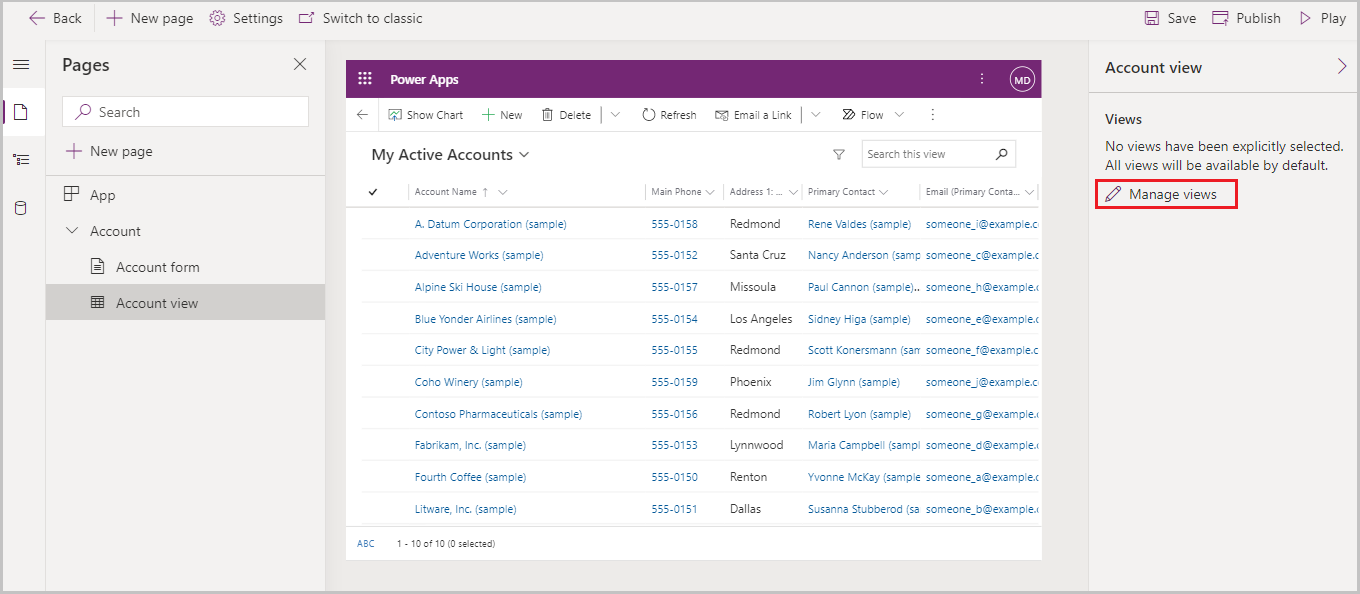

6. Control the appearance of an account.
7. Select Active Accounts, All Accounts, My Active Accounts, Account Advanced Find, and Account Lookup from the drop-down menus, then Save.
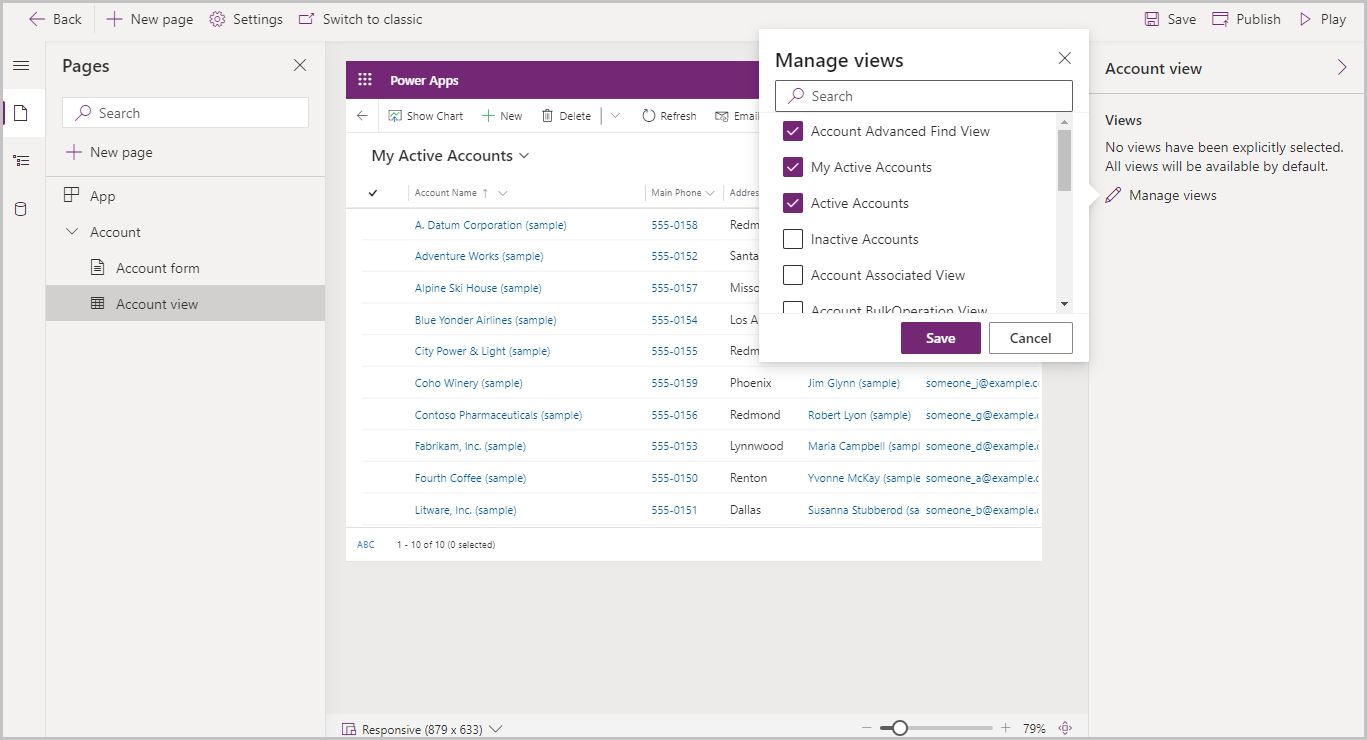

8. Select Save from the app designer command bar.
Publish Your App
1. Select Publish from the app designer command bar
2. After you’ve published the app, you can launch it or share it with others.
Use a desktop PC to test your app.
1. Sign in to Power Apps and pick Apps from the left navigation pane to run your app.
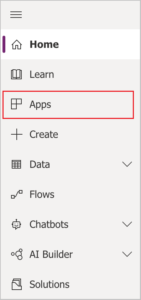

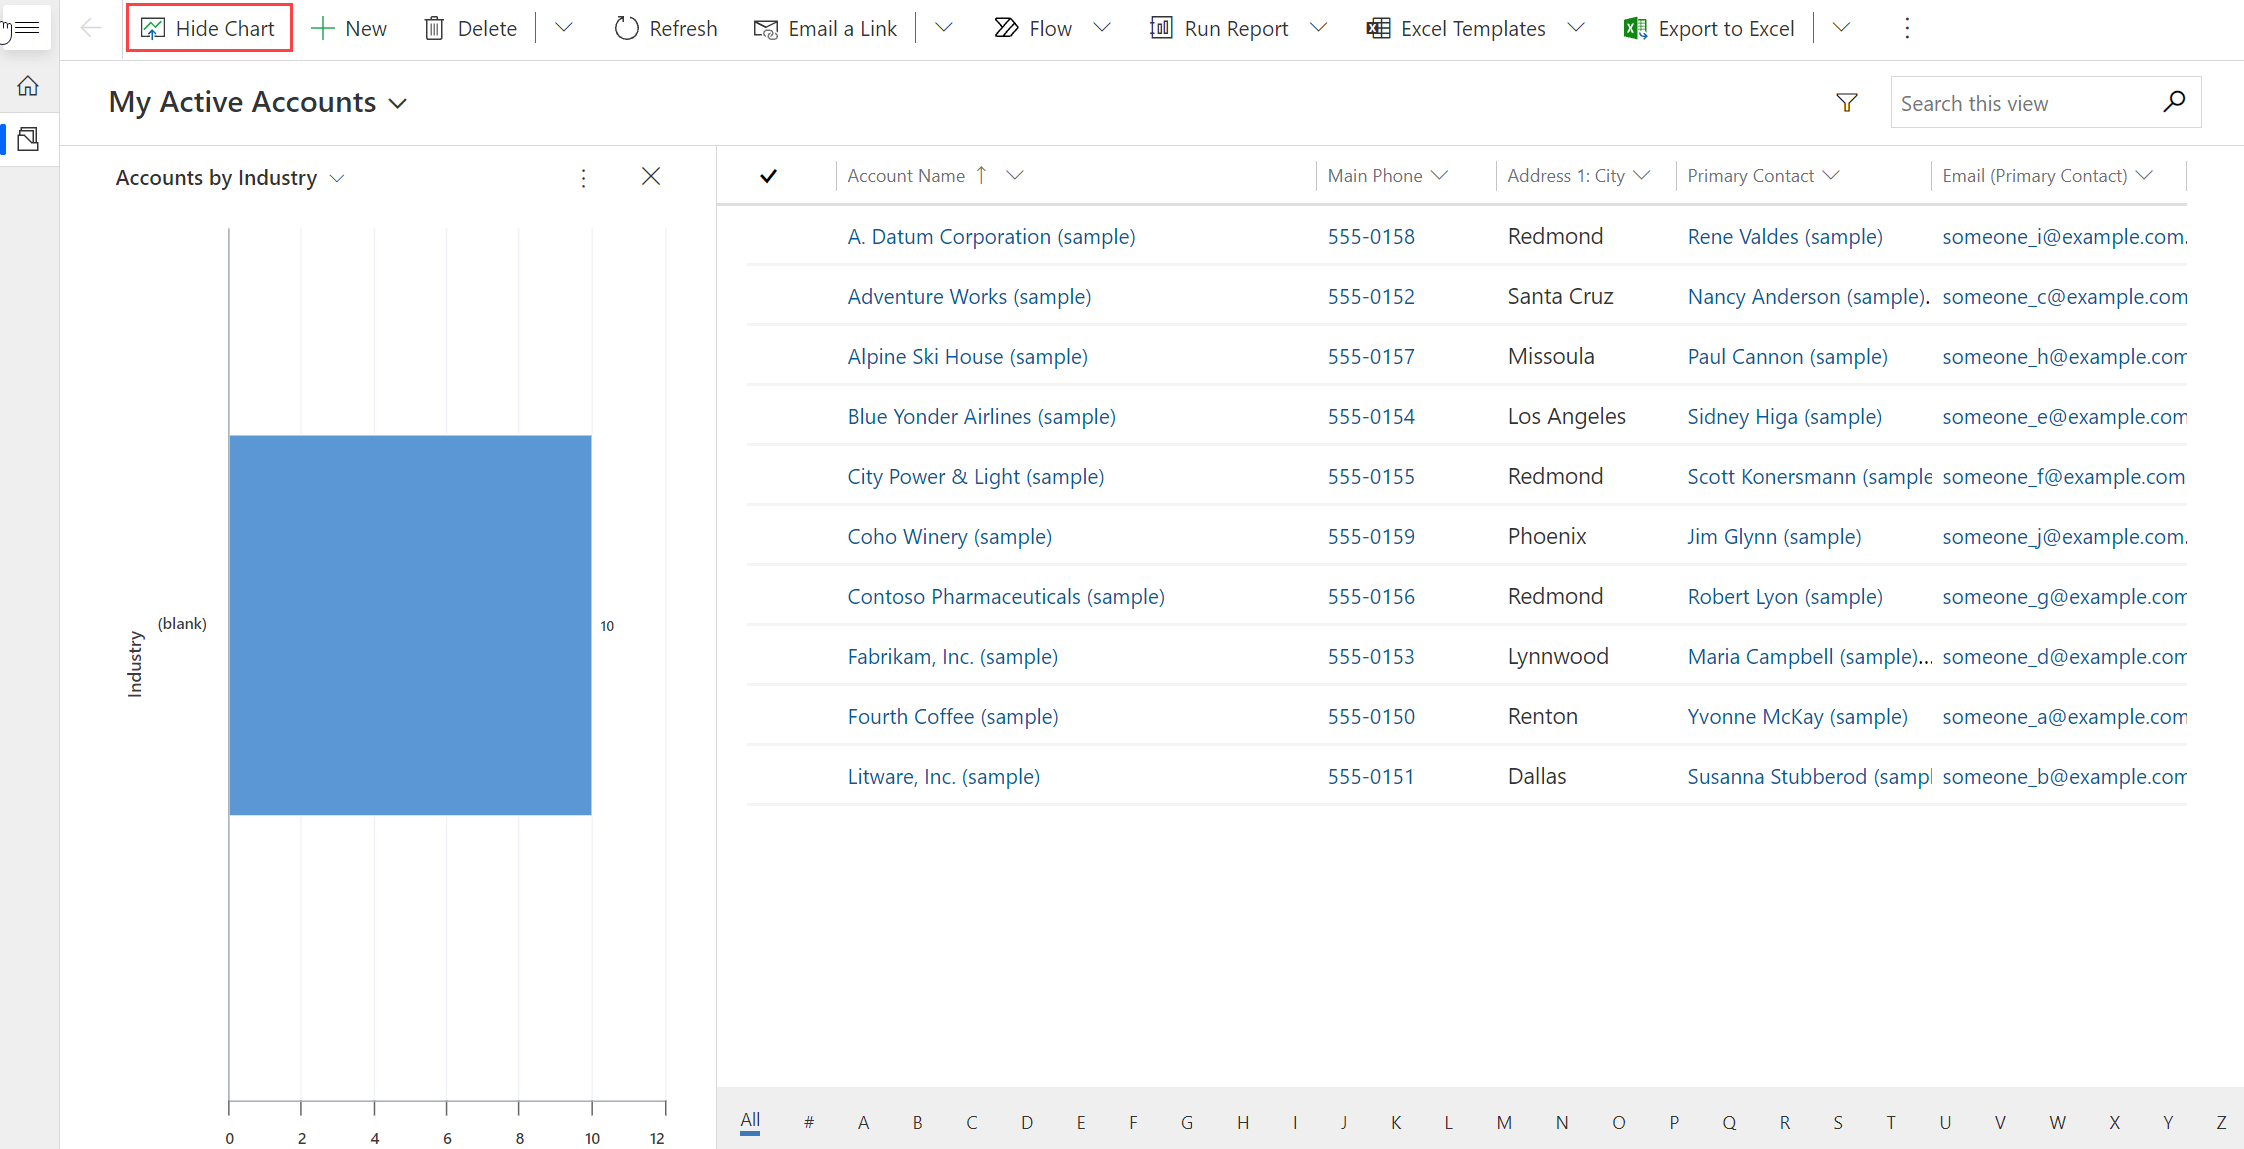
From the app list, choose the app you want to use. The application will launch in your browser. Toggling the show hide chart option will make the chart visible.

Run your app on a mobile device
Follow these steps to run your app on your mobile device:
To get the app, go to your device’s app store and search for it:
iOS (apple.com): Power Apps on the App Store
Android: Power Apps – Google Play Apps
To sign in, open the app, tap Sign in, and then sign in with your Microsoft work or school account.
To run your app, choose it from the list.
Image credits: Microsoft


